Physical Address
304 North Cardinal St.
Dorchester Center, MA 02124
Physical Address
304 North Cardinal St.
Dorchester Center, MA 02124
→ Aligning images by applying perspective transformation with OpenCV in Python.
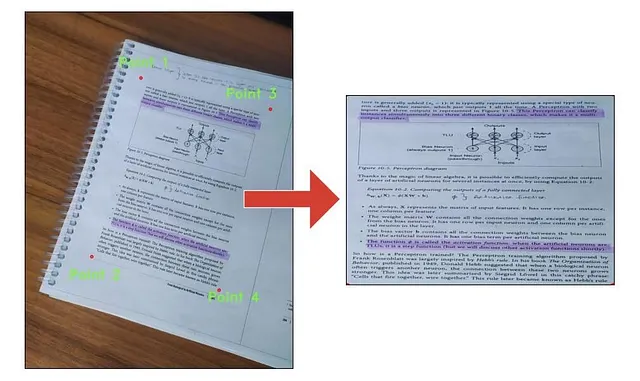
When dealing with computer vision tasks, most of the time, images are not exactly ready to use. For example, lets say you want to use OCR algorithms to extract text from book pages, but the images of the pages have different angles; some are horizontal, and some have varying rotations. You need to align the images perfectly for the best results.
In this article, I will show you how to align images using Perspective Transformations with OpenCV in Python.

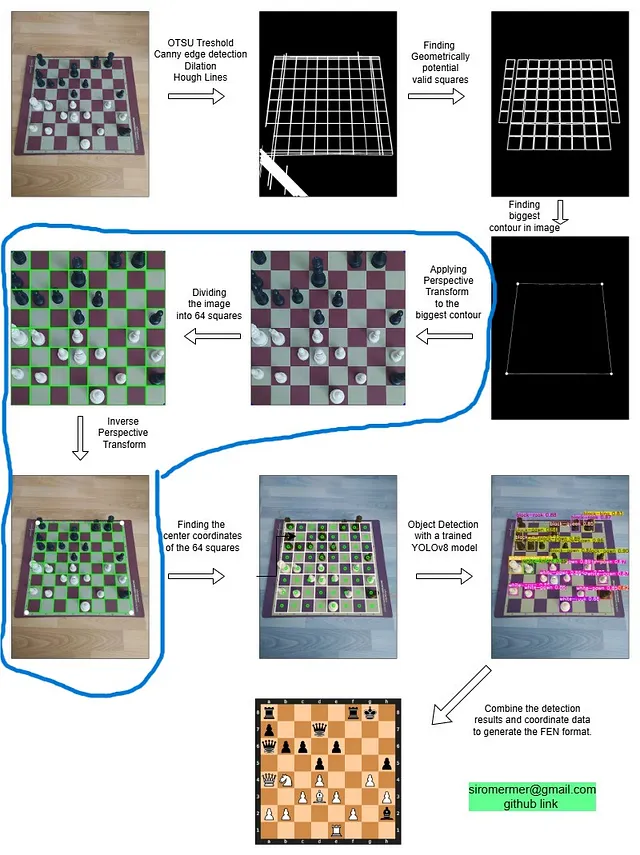
Nowadays, I am working on a chess project, and I am trying to generate FEN (a digital format for representing a chessboard on platforms like lichess.com and chess.com) from an image. I used different approaches for extracting the locations of squares and board, and one of them is Perspective Transformations. Look at the image below, by using perspective transformations chessboard is aligned perfectly.

Actually, I have different approaches for this task, and if you are interested, you can check the GitHub repository from here.
By using OpenCV, applying a perspective transformation to an object within an image is not that hard. You just need to define the coordinates of the object.
You need to choose 4 coordinates: top-left, bottom-left, top-right, and bottom-right. You can choose the points manually by looking at the image or write a simple script that shows your mouse coordinates within the image.
There are two functions for using Perspective Transformations in OpenCV:
For parameters and more information, you can check the official OpenCV documentation.
Now, let’s implement what we learned in code with Python.
Dont forget to change image path.
image = cv2.imread(r"images/chess1.jpeg")
rgb_image=cv2.cvtColor(image,cv2.COLOR_BGR2RGB)

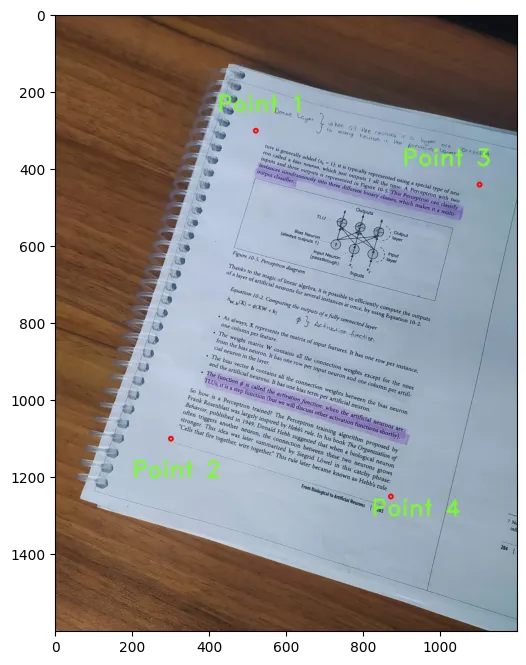
plt.imshow(rgb_image)

pt1=[520,300] # top-left
pt2=[300,1100] # bottom-left
pt3= [1100,440] # top-right
pt4=[870,1250] # bottom-right
Don’t forget, the sequence of points matters.
# calculating the distance between points ( Pythagorean theorem )
height_1 = np.sqrt(((pt1[0] - pt2[0]) ** 2) + ((pt1[1] - pt2[1]) ** 2))
height_2 = np.sqrt(((pt3[0] - pt4[0]) ** 2) + ((pt3[1] - pt4[1]) ** 2))

width_1 = np.sqrt(((pt1[0] - pt3[0]) ** 2) + ((pt1[1] - pt3[1]) ** 2))
width_2 = np.sqrt(((pt2[0] - pt4[0]) ** 2) + ((pt2[1] - pt4[1]) ** 2))

max_height=max(int(height_1), int(height_2))
max_width = max(int(width_1), int(width_2))

print(max_height,max_width) #  --> 842 596 in my case
We have 2 functions:
→ cv2.getPerspectiveTransform(src, dst)
→ cv2.warpPerspective(src, dst, dsize)
# four input point
input_pts=np.float32([pt1,pt2,pt3,pt4])

# output points for new transformed image
output_pts = np.float32([[0, 0],
                        [0, max_width],
                        [max_height , 0],
                        [max_height , max_width]])


# Compute the perspective transform M
M = cv2.getPerspectiveTransform(input_pts,output_pts)

out = cv2.warpPerspective(rgb_image,M,(max_height, max_width),flags=cv2.INTER_LINEAR)

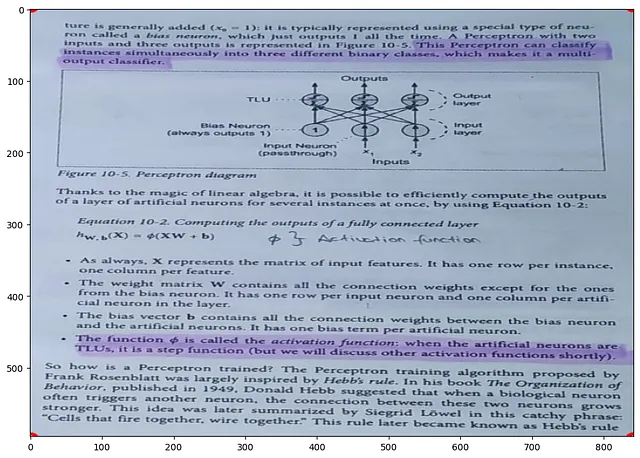
plt.imshow(out)

Look at the image orientation, it is ready to use for different applications.
