Physical Address
304 North Cardinal St.
Dorchester Center, MA 02124
Physical Address
304 North Cardinal St.
Dorchester Center, MA 02124
→ Detect objects with YOLO models, and by using detection information, segment these objects with SAM.
There are a bunch of segmentation models out there, and in general, they work similarly to each other. A typical pipeline for a segmentation model consists of collecting data, then configuring the model, and finally training a segmentation model. After that, you can run your model on videos, streams, or images. I have already written articles about training custom instance segmentation Mask R-CNN models, but to be honest, this pipeline might take time. Of course, there are different options, and one of them is SAM (Segment Anything Model).
With SAM, you only need to give some kind of coordinate to the model as input, and it will do all the segmentation for you. But SAM doesn’t provide labels as output, and it needs coordinate data as input. We will solve this by using pretrained YOLO object detection models.
Also, I have a YouTube video about this article, you can watch it.
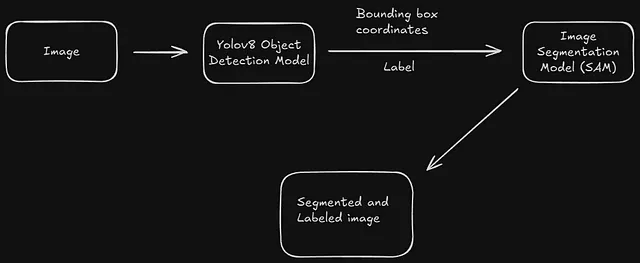
Before proceeding, you might wonder: why are we using a YOLO model? The answer is simple: SAM doesn’t give label output. It only does segmentation from position input. Another important point is that SAM expects coordinate data as input; based on that input, it will do segmentation. YOLO models don’t give only label output; they also provide bounding box coordinates.
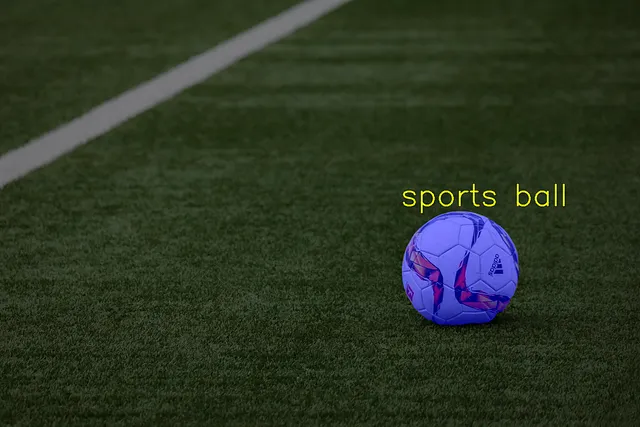
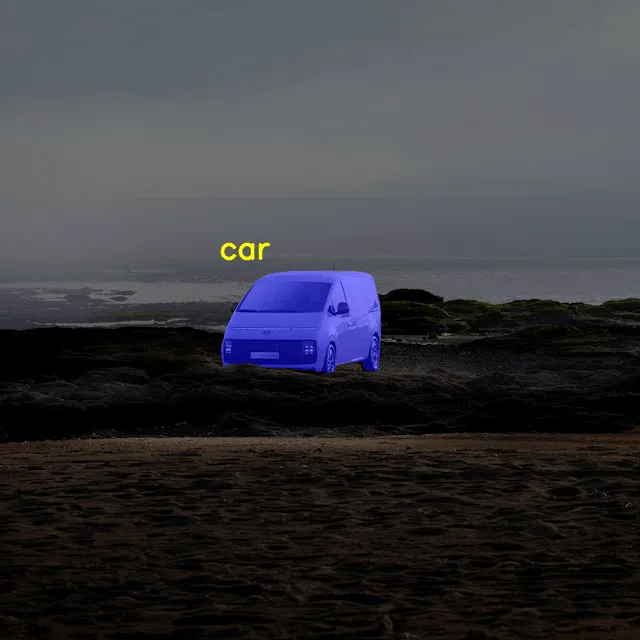
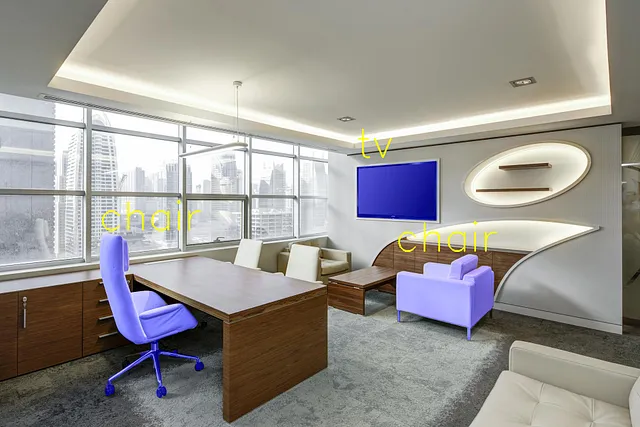
By using an object detection model, the object position and label will be found. Then, from the position data, segmentation will be done, and in the end, you will have a nicely segmented and labeled object.
Unlike other segmentation models you need to give position data to the SAM, there are 3 different information type that you can give as input:
Because we are using the YOLO model, the bounding box approach is the best fit for our purpose. The YOLO model gives bounding box coordinates as output, and we can directly use this data for segmentation. Just check the diagram below; it clearly explains what we are trying to build.
I already have an article about how to train a custom YOLO model, you can read it (link), but now I will use the pretrained yolov8n.pt model. If you decide to use a pretrained model, you can directly use the same code, and it will download the yolov8n model directly.
%pip install ultralytics
from ultralytics import YOLO

# Load a model
model = YOLO("yolov8n.pt")  # pretrained YOLO11n model

# Run batched inference on a list of images
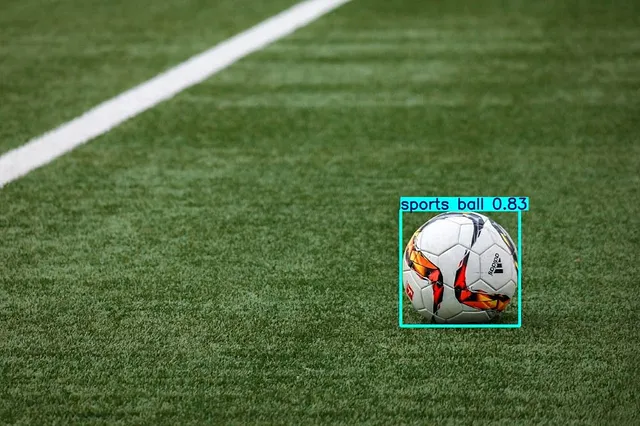
results = model([r"ball.jpg"])  # return a list of Results objects

# Process results list
for result in results:
    boxes = result.boxes  # Boxes object for bounding box outputs
    masks = result.masks  # Masks object for segmentation masks outputs
    keypoints = result.keypoints  # Keypoints object for pose outputs
    probs = result.probs  # Probs object for classification outputs
    obb = result.obb  # Oriented boxes object for OBB outputs
    result.show()  # display to screen
    result.save(filename="result.jpg")  # save to disk
First, you need to download the SAM model. You can download it from Hugging Face (link).
%pip install git+https://github.com/facebookresearch/segment-anything.git
%pip install opencv-python mediapipe ultralytics numpy torch matplotlib
import torch
import cv2
import numpy as np
import matplotlib.pyplot as plt
from ultralytics import YOLO
from segment_anything import sam_model_registry, SamPredictor
# Load YOLO model
model = YOLO("yolov8n.pt")

# Load SAM model
sam_checkpoint = "sam_vit_b_01ec64.pth"  # Replace with your model path
model_type = "vit_b"
device = "cuda" if torch.cuda.is_available() else "cpu"
print(device)

sam = sam_model_registry[model_type](checkpoint=sam_checkpoint)
sam.to(device=device)
predictor = SamPredictor(sam)
# Load image
image_path = r"ball.jpg"
image = cv2.imread(image_path)
image_rgb = cv2.cvtColor(image, cv2.COLOR_BGR2RGB)  # Convert to RGB for SAM

# Run YOLO inference
results = model(image, conf=0.3)

# Loop through detections
for result in results:
    # Get bounding boxes
    for box, cls in zip(result.boxes.xyxy, result.boxes.cls):
        x1, y1, x2, y2 = map(int, box)  # Convert to integers

        # get ID
        class_id = int(cls)  # Class ID
        # Get class label
        class_label = model.names[class_id]
        # Prepare SAM
        predictor.set_image(image_rgb)

        # Define a box prompt for SAM
        input_box = np.array([[x1, y1, x2, y2]])

        # Get SAM mask
        masks, _, _ = predictor.predict(box=input_box, multimask_output=False)

        # Create a copy of the original image for overlaying the mask
        highlighted_image = image_rgb.copy()

        # Apply the mask with semi-transparent blue color to the image
        mask = masks[0]
        # Create a blank image
        blue_overlay = np.zeros_like(image_rgb, dtype=np.uint8)
        # Blue color for the segmented area (RGB)
        blue_overlay[mask == 1] = [0, 0, 255]

        # Blend the blue overlay with the original image using transparency
        alpha = 0.7  # Transparency level for the overlay
        highlighted_image = cv2.addWeighted(highlighted_image, 1 - alpha, blue_overlay, alpha, 0)

         # Add label (class name) on top of the bounding box
        font = cv2.FONT_HERSHEY_SIMPLEX
        label = f"{class_label}"  # Label is the class name
        cv2.putText(highlighted_image, label, (x1, y1 - 10), font, 2, (255, 255, 0), 2, cv2.LINE_AA)

        # Optional: Save the image with the bounding box and highlighted segment
        output_filename = f"highlighted_output.png"
        cv2.imwrite(output_filename, cv2.cvtColor(highlighted_image, cv2.COLOR_RGB2BGR))
