When SAM3 first launched, I couldn't even test it locally. The model was too big for my GPU, and my VRAM wasn't enough. Later, I found a better GPU (it had like 24 GB VRAM), and used SAM3. It was amazing; with simple prompts, segmentation was great in most cases. But I know a lot of people who have low VRAM or don't have a GPU at all. After SAM3 launched, a lightweight version of SAM3 was released, named EfficientSAM3. Even if you don't have a GPU, you can run this lightweight SAM3 model. In this article, I will show you how to create an environment and run EfficientSAM3 models on images and videos.
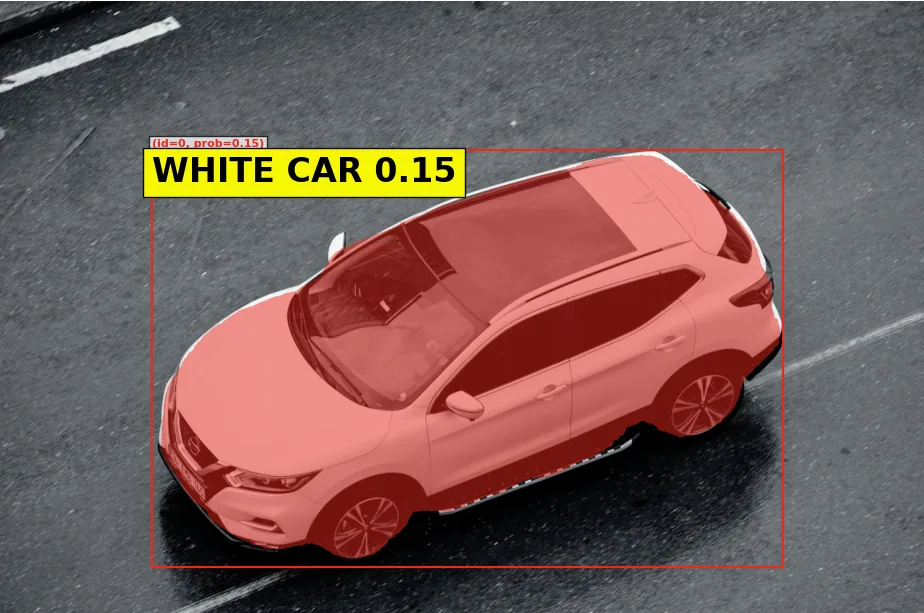
Running EfficientSAM3 model on images, prompt "animal" [img]
Before starting, you must be aware that there is a trade-off. Okay, we don't even need a GPU for running EfficientSAM3, but the accuracy is not as good as in SAM3. But this is totally expected.
But still, EfficientSAM3 models are useful for quick testing and demos. You can think of EfficientSAM3 as a small brother of SAM3. Less food, but less powerful.
Okay, let's start with creating an environment. By the way, I have a separate article about SAM3; you can check it:
Creating the Environment
This part might be tricky. I got some errors during installation even though I followed the official documentation. But I solved it; you can either follow the documentation or stick with what I do. There is a high chance you will get similar errors related to MMCV versions.
First, clone the EfficientSAM3 repository.
git clone https://github.com/SimonZeng7108/efficientsam3.git
cd efficientsam3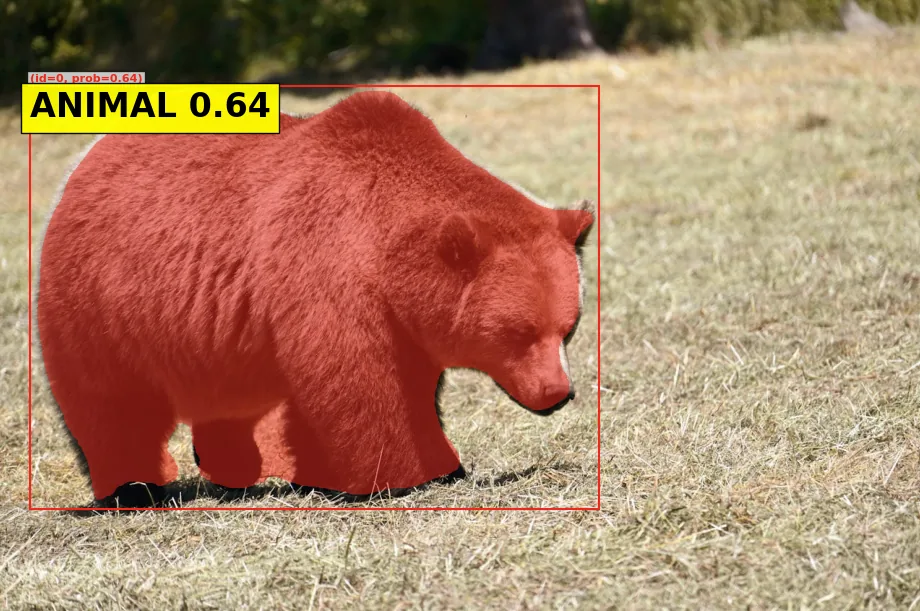
Inference with lightweight SAM3 model, prompt is "animal" [img]
Then create a new conda environment and activate it (it is recommended; you can try venv as well).
conda create -n efficientsam3-env python=3.12 -y
conda activate efficientsam3-env
Install a few more packages.
python -m pip install --upgrade pip wheel
python -m pip install "setuptools<82" packaging ninja
Create a constraint file for dependency solving (you can skip this; because of errors I got, I solved it like this).
python -c "open('constraints.txt','w').write('setuptools<82\n')"
type constraints.txt
set PIP_CONSTRAINT=%CD%\constraints.txt
Now, you have two options. If you want to run EfficientSAM3 on GPU, install PyTorch with CUDA support.
python -m pip install torch==2.7.0 torchvision torchaudio --index-url https://download.pytorch.org/whl/cu126If you don't have a GPU or want to run it on CPU, install PyTorch without CUDA:
pip install torch==2.7.0 torchvision torchaudioThen, install EfficientSAM3.
python -m pip install -e ".[stage1]" --no-cache-dirYou can verify if everything is okay by running these lines (don't forget to activate your environment).
python -c "import torch; print(torch.__version__, torch.version.cuda, torch.cuda.is_available())"
python -c "import setuptools; print(setuptools.__version__)"
python -c "import sam3; print('sam3 import ok')"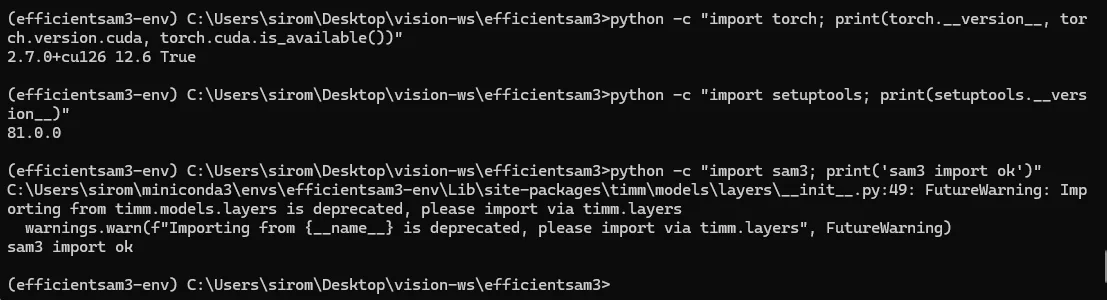
EfficientSAM3 environment verification
Pretrained Models
There is more than one pretrained model. Actually, for each run, you combine 2 different models. One text encoder and one image encoder. You can combine different encoder pairs. For faster inference, you can go for smaller models. Check the image below:
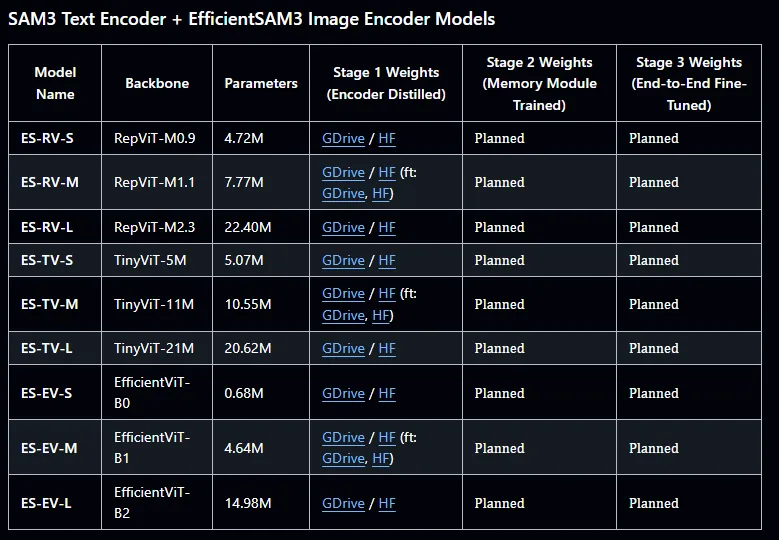
EfficientSAM3 text encoder models
By the way, you can use the original SAM3 text encoder with EfficientSAM3 image encoders, or the EfficientSAM3 text encoder with EfficientSAM3 image encoder models. Depending on your encoder pairs, besides results, latency will change.
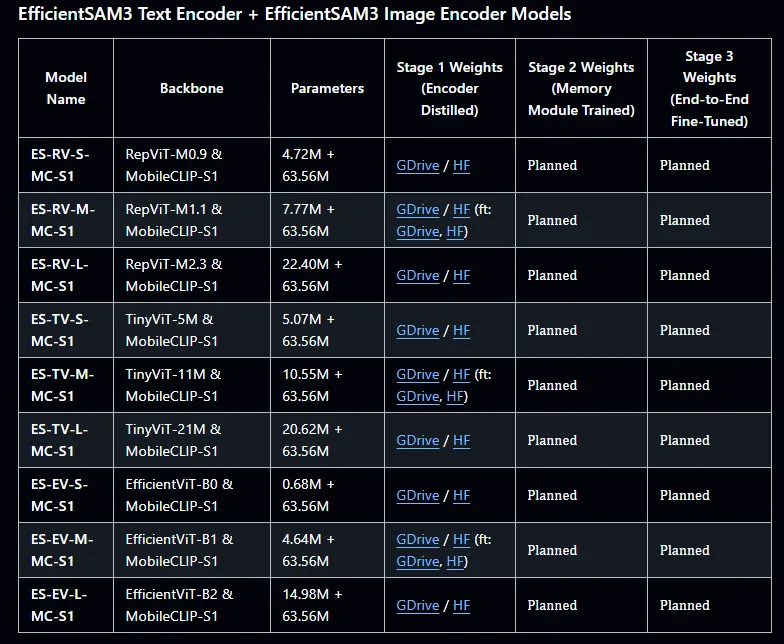
EfficientSAM3 encoder pairs
You can find all of the weights from the GitHub page of EfficientSAM3. In this article, I will use SAM3 Text Encoder and EfficientViT-B2 as an image encoder. As I said before, you can try different encoders.

EfficientSAM3 weight file
Now I will show you how you can segment objects with EfficientSAM3 models by giving text prompts. These text prompts can be a word or sentence.
Running EfficientSAM3 Model
I created a new notebook inside the efficientsam3\sam3\efficientsam3_examples directory.
First, let's import the necessary libraries.
import os
import sys
import glob
import torch
import matplotlib.pyplot as plt
from PIL import Image

import sam3
from sam3.model_builder import build_efficientsam3_image_model
from sam3.model.sam3_image_processor import Sam3Processor
from sam3.visualization_utils import plot_results

sam3_root = os.path.join(os.path.dirname(sam3.__file__), "..")

# Turn on tfloat32 for Ampere GPUs
torch.backends.cuda.matmul.allow_tf32 = True
torch.backends.cudnn.allow_tf32 = True

# Use bfloat16
torch.autocast("cuda", dtype=torch.bfloat16).__enter__()
Now, let's build our model. Depending on your encoder pairs, don't forget to change:
checkpoint_pathmodel_nametext_encoder_type
bpe_path = r"../assets/bpe_simple_vocab_16e6.txt.gz"
checkpoint_path = r"../assets/efficient_sam3_efficientvit_l_sa_1b_1p.pt"

model = build_efficientsam3_image_model(
    bpe_path=bpe_path,
    checkpoint_path=checkpoint_path,
    load_from_HF=False,
    backbone_type="efficientvit",
    model_name="b2",
)

processor = Sam3Processor(model, confidence_threshold=0.1)
Now, let's read the image and feed the image into the model.
image_path = r"../assets/images/animal.jpg"
image = Image.open(image_path).convert("RGB")
width, height = image.size
inference_state = processor.set_image(image)
Now, let's run the model. Here, the prompt is "animal".
text_prompt = "animal"
processor.reset_all_prompts(inference_state)
inference_state = processor.set_text_prompt(text_prompt, inference_state)

masks = inference_state["masks"]  # Type: torch.Tensor, Shape: (N, 1, H, W)
scores = inference_state["scores"]  # Type: torch.Tensor, Shape: (N,)
print("mask tensor:", type(masks), "shape:", tuple(masks.shape))
print("score tensor:", type(scores), "shape:", tuple(scores.shape))

img0 = Image.open(image_path).convert("RGB")
plot_results(img0, inference_state)

# Display the result image inline
plt.axis("off")
plt.show()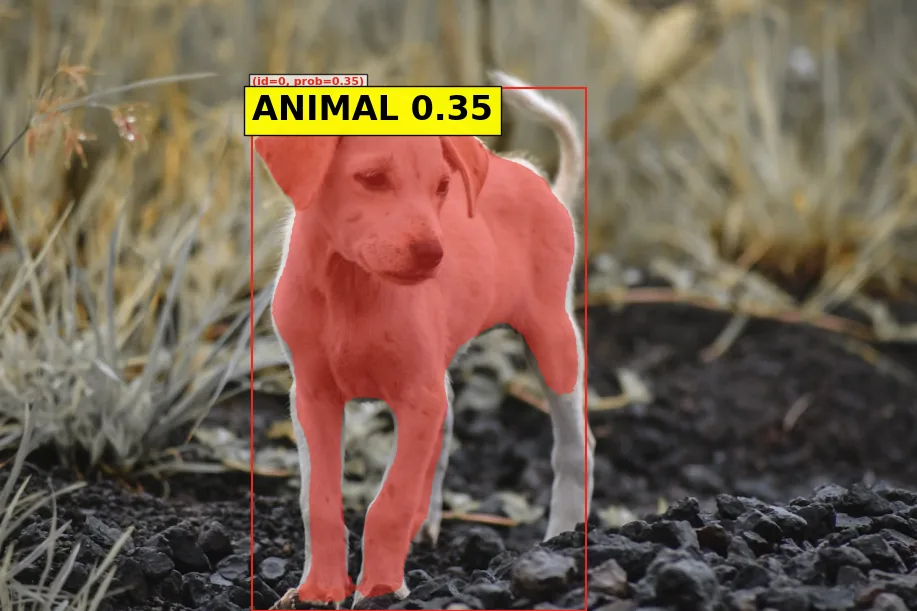
Inference with EfficientSAM3 [img]