Physical Address
304 North Cardinal St.
Dorchester Center, MA 02124
Physical Address
304 North Cardinal St.
Dorchester Center, MA 02124
→ Step-by-step guide for training Faster R-CNN object detection models in PyTorch with any dataset.
If you have spent some time with object detection in the computer vision area, you have probably heard of models like YOLO, SSD, or RCNN models. What are these RCNN models? There are so many different variations, like R-CNN, Fast R-CNN, Faster R-CNN, or Mask R-CNN, and this can be confusing at first. They all have different features and architectures, and they all serve object detection or segmentation tasks.
Now, I will share a pipeline for training Faster R-CNN object detection models with custom datasets using the PyTorch library. By following this pipeline, you can train your own Faster R-CNN object detection model with a custom dataset. Trust me, it is easier than you thought.
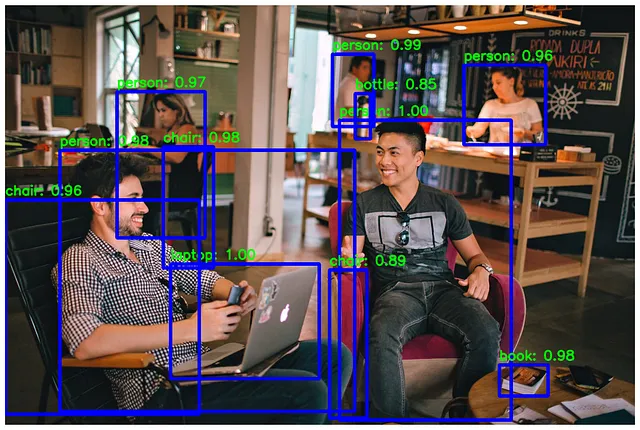
Also, I have a YouTube video about this article, you can watch it.
Now lets start.
Before starting to training, you need a dataset. There are big websites like Roboflow and Kaggle, and most of the time, you can find a dataset on these websites that fits your purpose. For using this pipeline, your dataset format must be COCO format, but with small tweaks, you can use different dataset formats.
Roboflow is user-friendly; it allows you to export a dataset in any format. On Kaggle, you can’t do this—you will download a dataset, and the format will be the same as the data owner’s format. I recommend you to use Roboflow if you have just started to train models.
I randomly selected a dataset from Roboflow (dataset link). You are free to choose any dataset; this pipeline will work for any dataset.
You should split your dataset into training and validation sets.
There is no magical number for this, but in general, 75% for training and 25% for validation is okay. By the way, if you have a big dataset, you can create a test set as well.
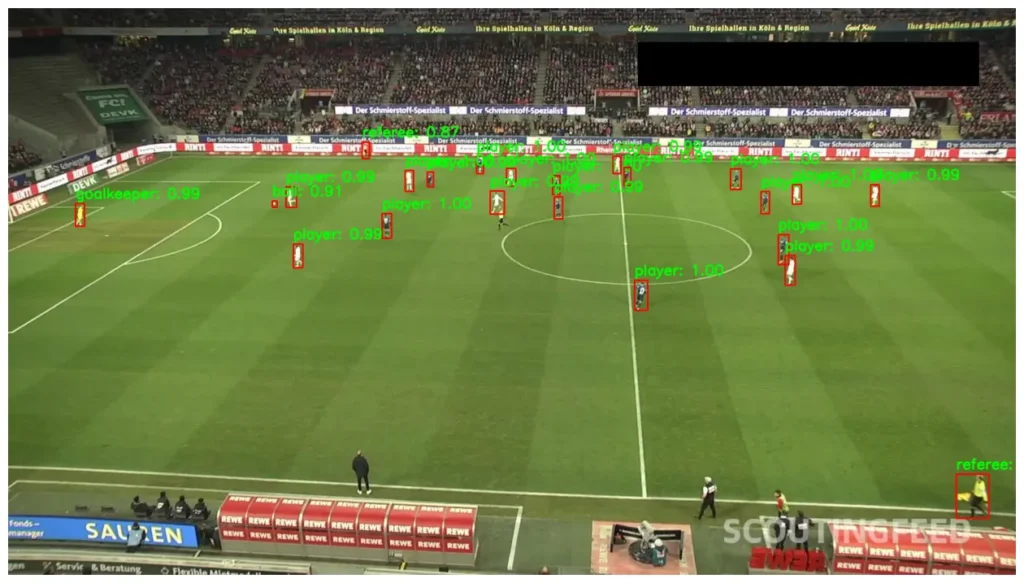
If you don’t have a GPU-supported PyTorch environment in your computer, you can use servers like Kaggle or Google Colab; they offer free GPU and environment that nearly all packages are pre-installed. You don’t have to deal with versions or anything else, just upload your dataset, and you are good to go.
Google Colab has some restrictions regarding time, but Kaggle is more generous; every week, you can use 30 hours of GPU time.
I have a GPU-supported PyTorch environment, and I will train it locally on my computer, but every step is the same, it doesnt matter where you train.
Anyway, if you want to create an environment for PyTorch with GPU support, you can watch this video.
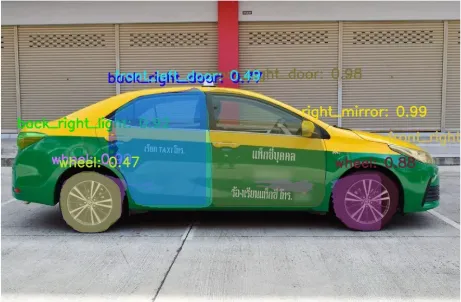
import matplotlib.pyplot as plt
import cv2
import os
import torch
from PIL import Image
import numpy as np
from torch.utils.data import Dataset
from pycocotools.coco import COCO

if torch.cuda.is_available():
    device = torch.device("cuda")
else:
    device = torch.device("cpu")

print(device)
"""
Output must be--> device(type='cuda')
"""
If you have a different dataset format other than COCO, you need to change some lines based on specific format.
# Custom PyTorch Dataset to load COCO-format annotations and images
class CocoDetectionDataset(Dataset):
    # Init function: loads annotation file and prepares list of image IDs
    def __init__(self, image_dir, annotation_path, transforms=None):
        self.image_dir = image_dir
        self.coco = COCO(annotation_path)
        self.image_ids = list(self.coco.imgs.keys())
        self.transforms = transforms

    # Returns total number of images
    def __len__(self):
        return len(self.image_ids)

    # Fetches a single image and its annotations
    def __getitem__(self, idx):
        image_id = self.image_ids[idx]
        image_info = self.coco.loadImgs(image_id)[0]
        image_path = os.path.join(self.image_dir, image_info['file_name'])
        image = Image.open(image_path).convert("RGB")

        # Load all annotations for this image
        annotation_ids = self.coco.getAnnIds(imgIds=image_id)
        annotations = self.coco.loadAnns(annotation_ids)

        # Extract bounding boxes and labels from annotations
        boxes = []
        labels = []
        for obj in annotations:
            xmin, ymin, width, height = obj['bbox']
            xmax = xmin + width
            ymax = ymin + height
            boxes.append([xmin, ymin, xmax, ymax])
            labels.append(obj['category_id'])

        # Convert annotations to PyTorch tensors
        boxes = torch.as_tensor(boxes, dtype=torch.float32)
        labels = torch.as_tensor(labels, dtype=torch.int64)
        area = torch.as_tensor([obj['area'] for obj in annotations],    dtype=torch.float32)
        iscrowd = torch.as_tensor([obj.get('iscrowd', 0) for obj in annotations], dtype=torch.int64)

        # Package everything into a target dictionary
        target = {
            "boxes": boxes,
            "labels": labels,
            "image_id": image_id,
            "area": area,
            "iscrowd": iscrowd
        }

        # Apply transforms if any were passed
        if self.transforms:
            image = self.transforms(image)

        return image, target
Don’t forget to change:
image_dir annotation_path
from torch.utils.data import DataLoader
from torchvision.transforms import ToTensor

# Transform PIL image --> PyTorch tensor
def get_transform():
    return ToTensor()

# Load training dataset
train_dataset = CocoDetectionDataset(
    image_dir="football-players-detection/train",
    annotation_path="football-players-detection/train/_annotations.coco.json",
    transforms=get_transform()
)

# Load validation dataset
val_dataset = CocoDetectionDataset(
    image_dir="football-players-detection/valid",
    annotation_path="football-players-detection/valid/_annotations.coco.json",
    transforms=get_transform()
)

# Load dataset with DataLoaders, you can change batch_size
train_loader = DataLoader(train_dataset, batch_size=2, shuffle=True, collate_fn=lambda x: tuple(zip(*x)))
val_loader = DataLoader(val_dataset, batch_size=1, shuffle=False, collate_fn=lambda x: tuple(zip(*x)))
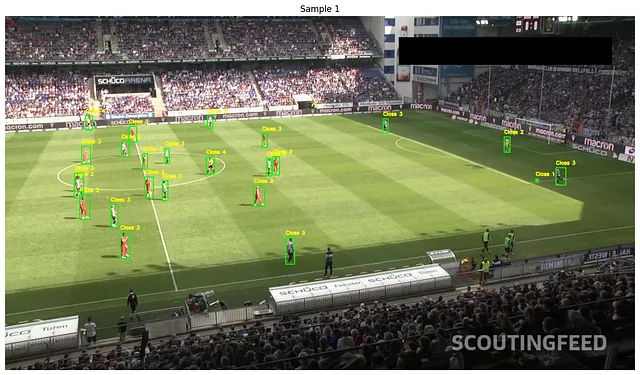
It is good practice to check some annotations and labels before starting training.
# Get one batch
images, targets = next(iter(train_loader))

# loop through one batch and draw bounding boxes and labels
for i in range(len(images)):
    # CxHxW --> HxWxC
    image = images[i].permute(1, 2, 0).numpy()
    # Rescale
    image = (image * 255).astype(np.uint8)
    # Convert RGB to BGR
    image = cv2.cvtColor(image, cv2.COLOR_RGB2BGR)

    # get bounding box coordinates and labels
    boxes = targets[i]['boxes']
    labels = targets[i]['labels']

    for box, label in zip(boxes, labels):
        x1, y1, x2, y2 = map(int, box.tolist())
        cv2.rectangle(image, (x1, y1), (x2, y2), (0, 255, 0), 2)
        cv2.putText(image, f"Class {label.item()}", (x1, y1 - 10),
                    cv2.FONT_HERSHEY_SIMPLEX, 0.5, (0, 255, 255), 2)

    # Show image with bboxes using matplotlib
    plt.figure(figsize=(16, 12))
    plt.imshow(cv2.cvtColor(image, cv2.COLOR_BGR2RGB))
    plt.axis("off")
    plt.title(f"Sample {i + 1}")
    plt.show()
from torchvision.models.detection.faster_rcnn import FastRCNNPredictor

# Load a pre-trained Faster R-CNN model with ResNet50 backbone and FPN, , you change this
model =torchvision.models.detection.fasterrcnn_resnet50_fpn(pretrained=True)

# Number of classes in the dataset (including background)
# +1 for bg class
num_classes = len(train_dataset.coco.getCatIds()) + 1

# Number of input features for the classifier head
in_features = model.roi_heads.box_predictor.cls_score.in_features

"""
Number of classes must be equal to your label number
"""
model.roi_heads.box_predictor = FastRCNNPredictor(in_features, num_classes)

# Move the model to the GPU for faster training
model.to(device)
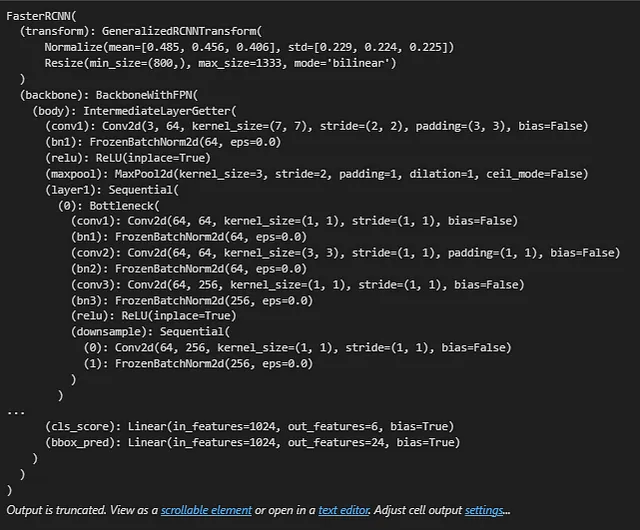
You can change this parameters:
lr(learning rate) momentumweight_decay
# Get parameters that require gradients (the model's trainable parameters)
params = [p for p in model.parameters() if p.requires_grad]

# Define the optimizer SGD(Stochastic Gradient Descent)
optimizer = torch.optim.SGD(params, lr=0.005,
                            momentum=0.9, weight_decay=0.0005)
First clone PyTorch vision repository from terminal:git clone https://github.com/pytorch/vision.git
Then copy these files to folder where your training script is located:
from engine import train_one_epoch, evaluate

# Number of epochs for training
num_epochs = 10

# Loop through each epoch
for epoch in range(num_epochs):
    print(f"\nEpoch {epoch + 1}/{num_epochs}")

    # Train the model for one epoch, printing status every 25 iterations
    train_one_epoch(model, optimizer, train_loader, device, epoch, print_freq=25)  # Using train_loader for training

    # Evaluate the model only on the validation dataset, not training
    evaluate(model, val_loader, device=device)  # Using val_loader for evaluation

    # save the model after each epoch
    torch.save(model.state_dict(), f"model_epoch_{epoch + 1}.pth")
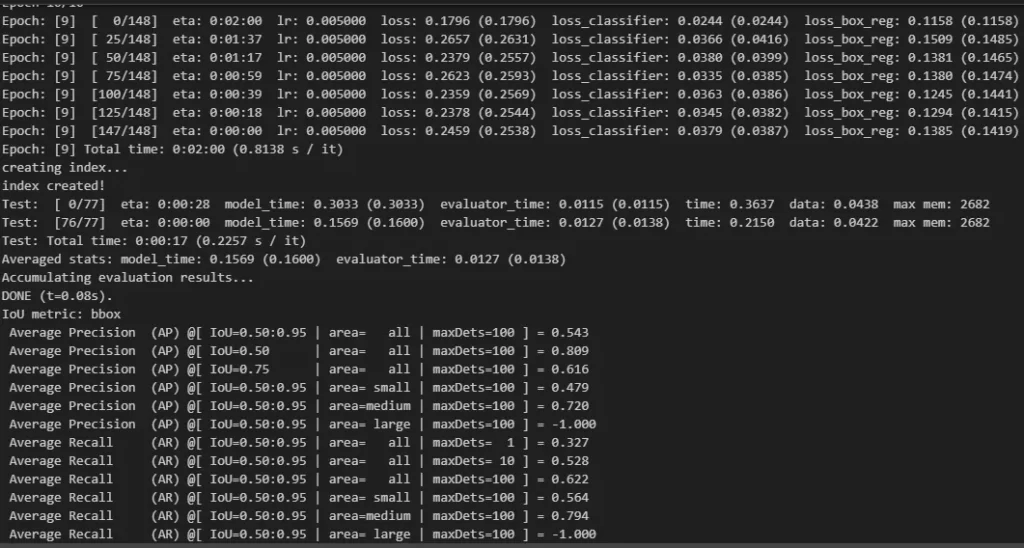
Training might take a long time depending on your hardware and training parameters
from torchvision import models, transforms

# class names
label_list= ["","ball", "goalkeeper", "player", "referee",""]

# Number of classes (include background)
num_classes = 6   # this has to be 5 in normally, but because of some labeling issues in dataset this is 6.

# Load the same model
model = models.detection.fasterrcnn_resnet50_fpn(pretrained=False, num_classes=num_classes)

# Load trained Faster R-CNN model
model.load_state_dict(torch.load(r"faster-rcnn-torch\model_epoch_10.pth"))
model.eval()

# Load image with OpenCV and convert to RGB
img_path = r"test-image.jpg" # CHANGE this to your image path
image_bgr = cv2.imread(img_path)
image_rgb = cv2.cvtColor(image_bgr, cv2.COLOR_BGR2RGB)
image_pil = Image.fromarray(image_rgb)


transform = transforms.Compose([transforms.ToTensor()])
image_tensor = transform(image_pil).unsqueeze(0)

# Inference
with torch.no_grad():
    predictions = model(image_tensor)

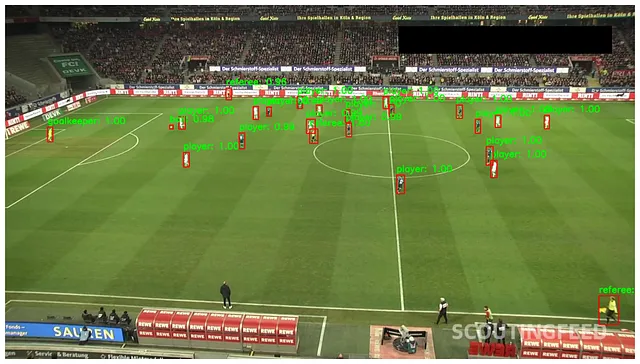
# detection data
boxes = predictions[0]['boxes']
labels = predictions[0]['labels']
scores = predictions[0]['scores']

"""
Higher threshold give you more accurate detections,
but number of predictions is reduced; there is a simple trade-off
"""
threshold = 0.8
for i in range(len(boxes)):
    if scores[i] > threshold:
        box = boxes[i].cpu().numpy().astype(int)
        label = label_list[labels[i]]
        score = scores[i].item()


        text = f"{label}: {score:.2f}"
        cv2.putText(image_bgr, text, (box[0], box[1] - 10), cv2.FONT_HERSHEY_SIMPLEX,
                    0.9, (0, 255, 0), 2, cv2.LINE_AA)

        # Draw bbox and label
        cv2.rectangle(image_bgr, (box[0], box[1]), (box[2], box[3]), (0, 0, 255), 2)


# Convert BGR --> RGB
image_rgb = cv2.cvtColor(image_bgr, cv2.COLOR_BGR2RGB)

# Show image with larger figure size
plt.figure(figsize=(16, 12))
plt.imshow(image_rgb)
plt.axis('off')
plt.show()
If you want to train instance segmentation models with Mask R-CNN using PyTorch, I have another article you can read. The whole process is almost the same as in this one.