Physical Address
304 North Cardinal St.
Dorchester Center, MA 02124
Physical Address
304 North Cardinal St.
Dorchester Center, MA 02124
→ Step-by-step guide for training custom Vision Transformer image classification models in PyTorch.
Until recently, CNNs(Convolutional Neural Networks) were the best option for most computer vision tasks. But in 2021, a paper named “AN IMAGE IS WORTH 16X16 WORDS: TRANSFORMERS FOR IMAGE RECOGNITION AT SCALE” was published, and it dramatically changed the computer vision field. The idea is basically treating images like sentences, splitting images into patches and treating them like words, and this approach became a solid choice in the computer vision domain.
In this article, I will share my pipeline for training ViT image classification models on PyTorch with custom datasets.
Also, I have a YouTube video about this article, you can watch it.
I am not going to talk about theory in depth, because I don’t think I am capable enough to explain this in depth, but I strongly recommend you read the official paper about ViT, or there are so many resources about vision transformers.
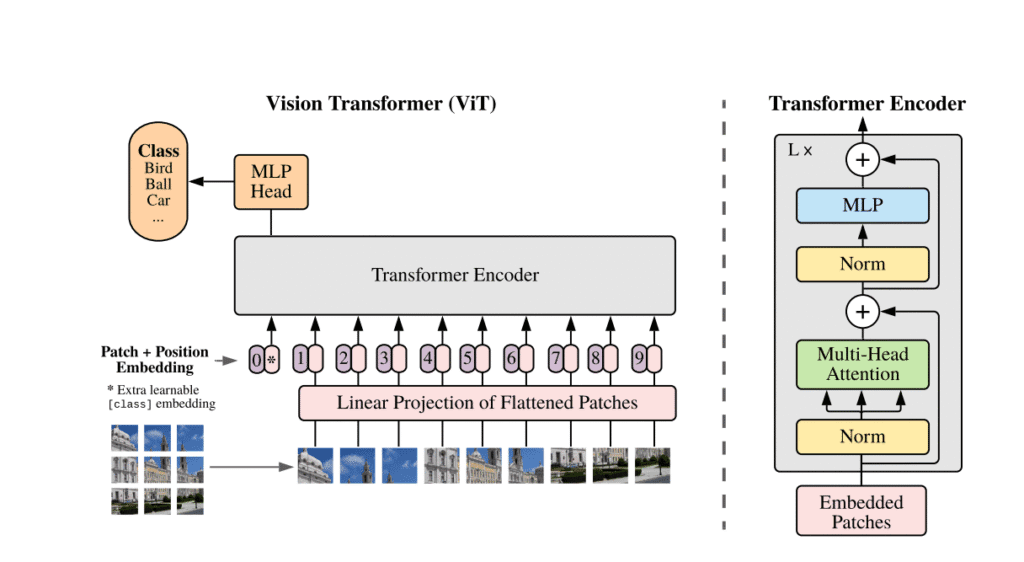
At a high level, vision transformers split images into fixed-size patches, flatten these patches, and add positional embeddings to them, and then use a transformer encoder to learn the associations of patches and global features. In the end, the classifier head makes predictions. You can check the image below.
I will explain everything step by step; there will be 6 steps.
But before these 6 steps, we need to choose a dataset and set up our training environment. I randomly chose a dataset from Kaggle (link), but you don’t have to use this; this pipeline will work for any dataset.

I have a GPU-supported PyTorch environment on my local machine. If you don’t have one, you can directly use Kaggle; you don’t have to pay anything. Just sign up and create a new notebook, then activate the GPU. You have a 30-hour weekly usage limit, and it will be more than enough for most of the tasks. Now, we can start coding, lets gooo
You can check Hugging Face for different pretrained ViT models, and I will use google/vit-base-patch16-224-in21k
Don’t forget to change num_labels to the number of classes in your dataset.
from transformers import ViTForImageClassification, ViTFeatureExtractor
import torch
import os

device = torch.device("cuda" if torch.cuda.is_available() else "cpu")

# Load pretrained ViT model
model_name = "google/vit-base-patch16-224-in21k"  # pretrained on ImageNet21k
# change num_labels to number of classes in your dataset
model = ViTForImageClassification.from_pretrained(model_name, num_labels=len(os.listdir(r"archive/Vehicles")))

# move model to device(GPU)
model.to(device)

# Feature extractor (for normalization)
feature_extractor = ViTFeatureExtractor.from_pretrained(model_name)
As I said before, you can use a different dataset, but don’t forget to change the path to the dataset when using the ImageFolder class.
Here, I split the dataset into 80 percent for the training set and 20 percent for the validation set.
from torchvision import datasets, transforms
from torch.utils.data import random_split

"""
ViT pretrained models were trained on 224×224 images, so the positional embeddings are fixed for that size.
"""

transform = transforms.Compose([
    # resize to 224x224
    transforms.Resize((224, 224)),
    # convert image to tensor
    transforms.ToTensor(),
    # normalize using feature extractor parameters
    transforms.Normalize(mean=feature_extractor.image_mean, std=feature_extractor.image_std)
])

# load all data, change "archive/Vehicles" to your dataset path
full_dataset = datasets.ImageFolder("archive/Vehicles", transform=transform)

# split ratio
val_ratio = 0.2
val_size = int(len(full_dataset) * val_ratio)
train_size = len(full_dataset) - val_size

train_data, validation_data = random_split(full_dataset, [train_size, val_size])
Now we will create instances of the DataLoader class to generate batches for training and validation.
from torch.utils.data import DataLoader

train_set = DataLoader(train_data, batch_size=8, shuffle=True, num_workers=1)
validation_set = DataLoader(validation_data, batch_size=8, shuffle=False, num_workers=1)

train_set,validation_set

DataLoader class for training and validation setsIt is always good practice to see some examples from the dataset to make sure everything is okay.
import matplotlib.pyplot as plt
import numpy as np
import torchvision
from torchvision.transforms.functional import to_pil_image

# Get class names
label_dict = {y: x for x, y in train_data.dataset.class_to_idx.items()}

# Define a function to display images
def show_images(images, labels):
    plt.figure(figsize=(12, 8))
    for i in range(len(images)):
        plt.subplot(4, 4, i + 1)
        image = to_pil_image(images[i])  # Convert tensor to PIL Image
        plt.imshow(image)
        plt.title(label_dict[labels[i].item()])
        plt.axis('off')
    plt.show()

# Get the first batch
for batch_idx, (images, labels) in enumerate(train_set):
    if batch_idx == 0:  # Only process the first batch
        show_images(images, labels)
        break
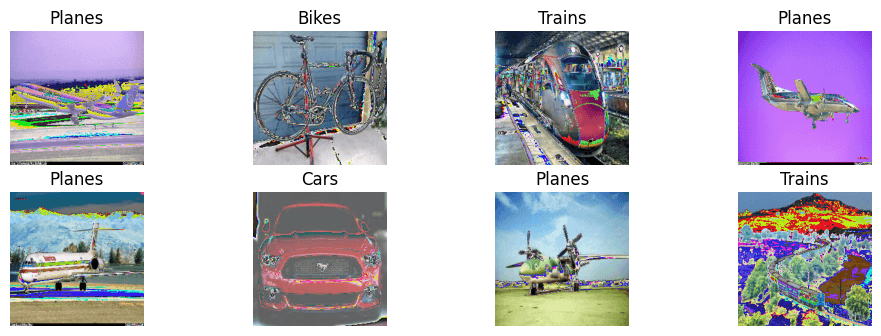
You can use different optimizers or add a learning rate scheduler, but for now I will go with the simplest possible way.
import torch.nn as nn
import torch.optim as optim

# CrossEntropyLoss
loss_fn = nn.CrossEntropyLoss()
# AdamW optimizer
optimizer = optim.AdamW(model.parameters(), lr=5e-5)

# Move model to the GPU
device = torch.device("cuda" if torch.cuda.is_available() else "cpu")
print(device)
model.to(device)
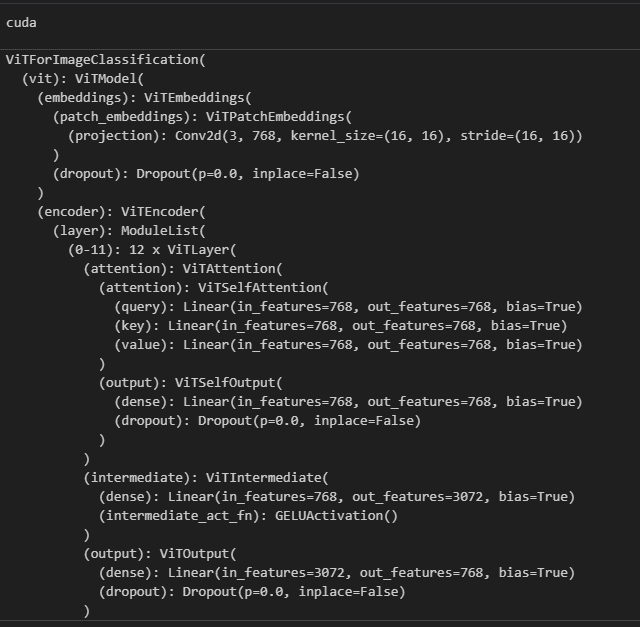
We need two different functions for the train and validation sets. We will update our model’s weights with the train set and evaluate our model with the validation set.
# add accuracy values to the list
train_accuracies=[]
validation_accuracies=[]

# Function for training
def train(dataloader, model, loss_fn, optimizer, epoch):
    # Get total number of samples
    size = len(dataloader.dataset)
    num_batches = len(dataloader)

    # Set model to training mode
    model.train()

    # Initialize variables
    train_loss, correct = 0, 0

    # Iterate over batches, process each batch separately
    for batch, (X, y) in enumerate(dataloader):
        # Move image and label tensors to the GPU for faster processing
        X, y = X.to(device), y.to(device)

        # make prediction and extract logits
        pred = model(X).logits

        # calculate loss
        loss = loss_fn(pred, y)

        # calculate gradients
        loss.backward()
        # update model parameters using gradients
        optimizer.step()
        # clear gradients
        optimizer.zero_grad()

        # Update training loss
        train_loss += loss.item()

        # Calculate training accuracy
        correct += (pred.argmax(1) == y).type(torch.float).sum().item()

    # loss and accuracy
    train_loss = train_loss / num_batches
    accuracy = 100 * correct / size

    train_accuracies.append(accuracy)

    print(f" Training Accuracy: {accuracy:.2f}%, Training Loss: {train_loss:.4f}")
# Function for validation
def validation(dataloader, model, loss_fn, epoch):

    # Get total number of samples
    size = len(dataloader.dataset)
    num_batches = len(dataloader)

    # Initialize variables
    validation_loss, correct = 0, 0

    # !!!! Set model to evaluation mode, weights not updated
    model.eval()

    # Disable gradient calculation
    with torch.no_grad():
        for X, y in dataloader:
            # Move image and label tensors to the GPU for faster processing
            X, y = X.to(device), y.to(device)

            # extract logits
            pred = model(X).logits

            # Calculate validation loss and accuracy
            validation_loss += loss_fn(pred, y).item()
            correct += (pred.argmax(1) == y).type(torch.float).sum().item()

    # Average validation loss and accuracy
    validation_loss /= num_batches
    accuracy = 100 * correct / size

    validation_accuracies.append(accuracy)

    print(f" Validation Accuracy: {accuracy:.2f}%, Validation Loss: {validation_loss:.4f}")
There are a few differences between these two functions, and most importantly, in the validation function, the model weights are not updated.
The dataset is very small, so that is why the model fits quickly. I only trained for 5 epochs, but for larger datasets, you need to increase the epoch number for sure.
# epoch number
epochs = 5

# loop for training model
for t in range(epochs):
    print(f"Epoch {t+1}")
    train(train_set, model, loss_fn, optimizer, t)
    validation(validation_set, model, loss_fn, t)
    print("----------------------------")
print("Done!")

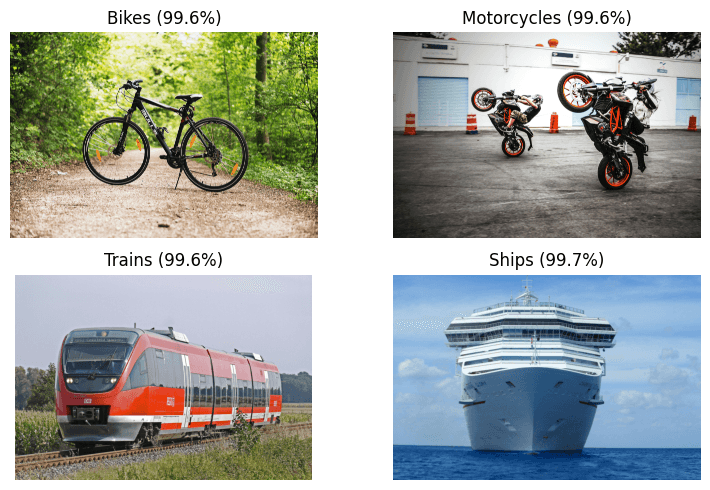
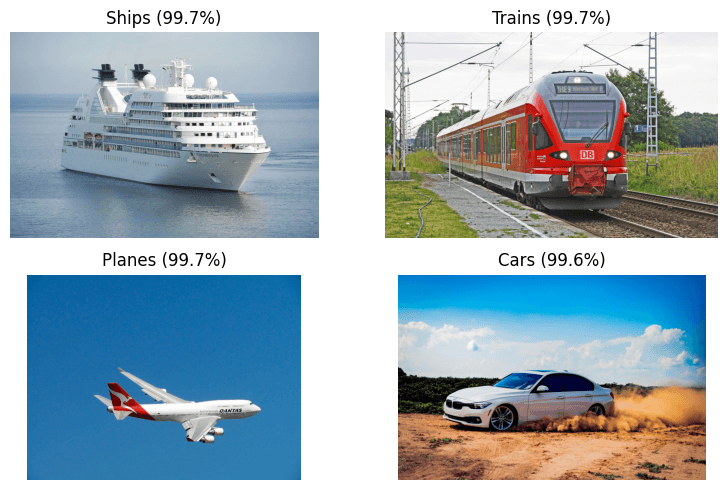
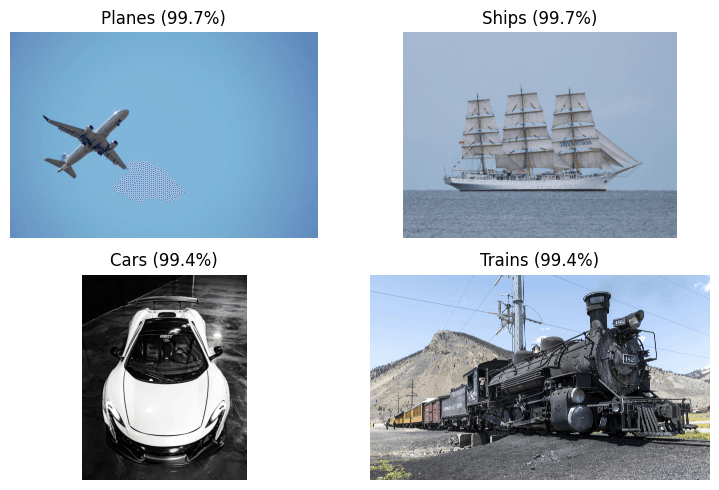
Training is finished, and it is time for testing. I donwloaded random images from internet for testing. Dont forget to change image_path
import os
from PIL import Image
import torch
import matplotlib.pyplot as plt
from torchvision import transforms

# device
device = torch.device("cuda" if torch.cuda.is_available() else "cpu")

# transform same as training
predict_transform = transforms.Compose([
    transforms.Resize((224, 224)),
    transforms.ToTensor(),
    transforms.Normalize(mean=feature_extractor.image_mean, std=feature_extractor.image_std)
])

# get class names from dataset
class_names = train_data.dataset.classes if isinstance(train_data, torch.utils.data.Subset) else train_data.classes

# path to single test image
image_path = r"test-images\pexels-raf-jabri-29128-113585.jpg"  # change to your image path

# load and transform image
img = Image.open(image_path).convert("RGB")
input_tensor = predict_transform(img).unsqueeze(0).to(device)

# predict
model.eval()
with torch.no_grad():
    outputs = model(input_tensor).logits
    pred_class = outputs.argmax(1).item()
    prob = torch.softmax(outputs, dim=1)[0, pred_class].item()

# display image with predicted label
plt.figure(figsize=(5,5))
plt.imshow(img)
plt.title(f"{class_names[pred_class]} ({prob*100:.1f}%)")
plt.axis("off")
plt.show()
