Physical Address
304 North Cardinal St.
Dorchester Center, MA 02124
Physical Address
304 North Cardinal St.
Dorchester Center, MA 02124
→ Step-by-step guide for training YOLO object detection models with any dataset for any task.
Object detection is an important part of computer vision, and when you consider real-time performance and accuracy, YOLO models are the most preferred ones. There are different versions of YOLO models, but with the Ultralytics library, every step is nearly the same.
In this article, I will share my pipeline to train a YOLO object detection model, and I will cover preparing the dataset, configuration files, and different YOLO models of YoloV8.
By following this step-by-step guide, you can train your own YOLO object detection models with any dataset for any task.
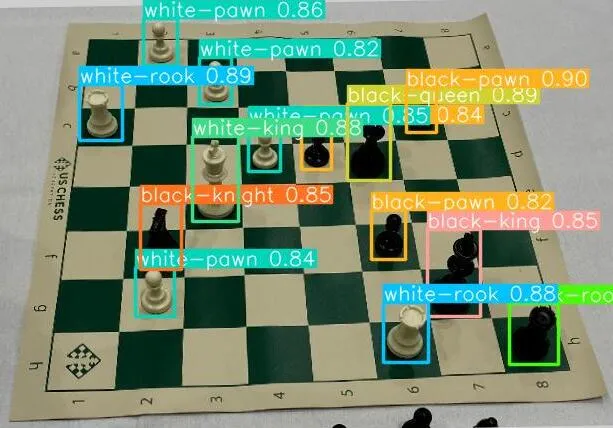
Also, I have a YouTube video about this article, you can watch it.
You need a GPU for training a Deep Learning model, especially if your task includes images. In the background, a lot of calculations occur. So you need GPUs for faster computations, otherwise it might take weeks to train even a small model.
You might not have a GPU, or even if you have a GPU, you might not prefer to create an environment because there are a lot of compatibility issues between CUDA, cuDNN, and PyTorch versions.
You can directly use servers like Kaggle and Google Colab. They are super friendly, after spending a little time, everything will be fine.
I recommend you use Kaggle because it is completely free, and it offers 30 hours of training time weekly, and trust me it is more than enough. You just need to upload your dataset to Kaggle and create a notebook, and then every step is the same, just write code in the cells D:
Anyway, if you want to create an environment for PyTorch with GPU support, you can watch this video.
There are seven main steps in my pipeline, and I will explain them one by one
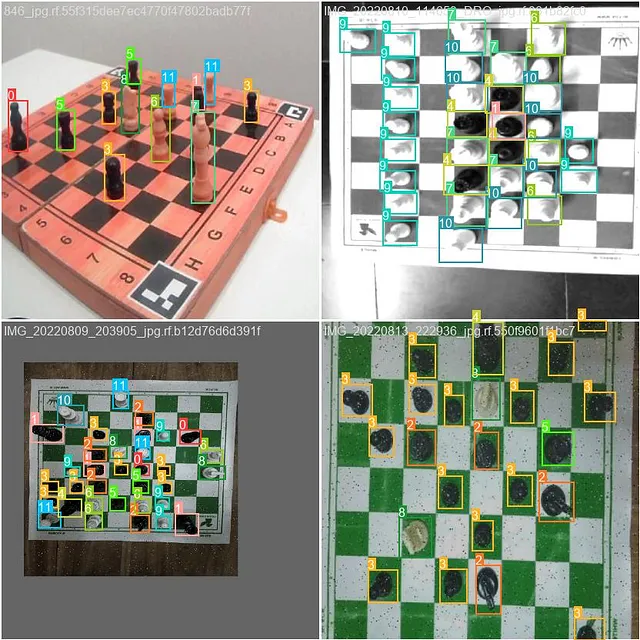
Data is one of the most important things in Deep Learning. Without proper data, it is impossible to train a model that performs well in different environments. There are two main ways to acquire data, you can either create your own or find a dataset from the internet.
I always first check the internet, and if I can’t find data that fits my purpose, then I create my data by myself. As I said before, creating a dataset from scratch is an time-consuming process, but sometimes you have to create your own dataset especially for specific tasks.
For this article, I will use this dataset
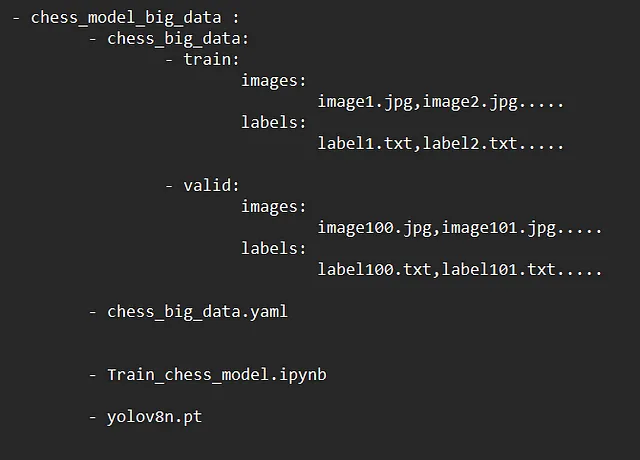
You need one main folder, and store everything inside it.
In the end, folders and files have to be like the image below. Now, step by step we create this files and folders.
YAML file contains information about the path of the dataset, the number of different classes, and the names of classes. I named the YAML file as chess_big_data.yaml, and you can name it whatever you want, but don’t forget to write the same name when needed.
train: C:/ml_dl_cv_files/computer-vision-main/chess/chess_model_big_data/chess_big_data/train/images
val: C:/ml_dl_cv_files/computer-vision-main/chess/chess_model_big_data/chess_big_data/valid/images

nc: 12

names: ['black-bishop', 'black-king', 'black-knight', 'black-pawn', 'black-queen',
        'black-rook', 'white-bishop', 'white-king', 'white-knight', 'white-pawn',
        'white-queen', 'white-rook']

There are a bunch of pretrained YOLOv8 models and choosing the pretrained model is completely depends on your purpose. If you want higher accuracy you need to choose the more complex(bigger) model, or if you need higher FPS you need to choose more basic models. There is a trade-off between speed and accuracy.
But this is not true all the time, with bigger model metrics might be worse, because there are other factors like quality and quantity of the dataset.
If your dataset is not complex or not big, I recommend you to choose smaller models.
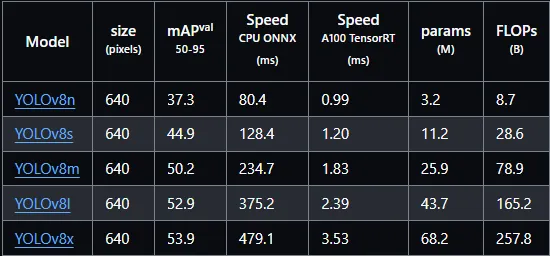
YOLOv8m is a great choice for both real-time performance and accuracy
Choose a pretrained model and download it, then paste it into the base project folder. I downloaded YOLOv8m, but nothing changes, you can choose another model.
Ohh, I almost forgot, if you choose bigger models, intuitively training will take more time.
Now create a file for training. I prefer to use Jupyter notebooks, and 99% of people use notebooks for training models. If you are using Kaggle or Google Colab, you already have a notebook.
I named my notebook as a Train_chess_model.ipynb
There are hundreds of parameters and you can check documentation for explanations
from ultralytics import YOLO
import torch

# check if GPU is available
print(torch.cuda.get_device_name(0))

# Load the model.
model = YOLO('yolov8m.pt') # pretrained model

# Training.
results = model.train(
   data='chess_big_data.yaml',  # .yaml file
   imgsz=416, # image size
   epochs=50,  # epoch number
   batch=4, # batch size, you can change this depending to your GPU
   name='chess_big_data_model4', # The output folder name; model weights and all of the other things will be stored here.
    plots=True, # Plots about metrics (precision, recall,f1 score)
 amp=False, # amp=True gives me an error, If it doesn't give you an error, set it to True
For training, simply run the Python file. When training starts, you might be surprised because there are going to be many lines about the model, labels, and folders. If everything works well, the training will start.
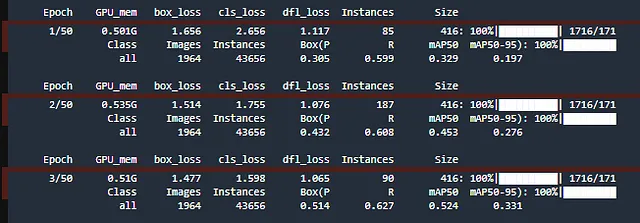
It may take a long time depending to GPU.

After training is finished, there will be a summary about model that contains precision, recall, and mAP values.
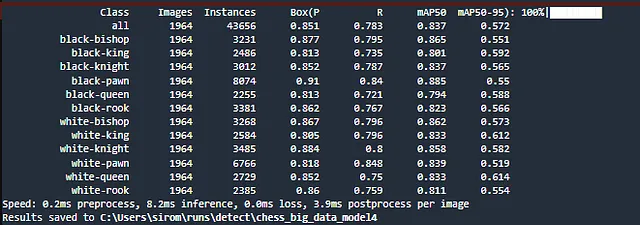
After training is finished, you will see a line indicating: Results saved to “some_folder”, and this folder is exactly the same as name in the training script. Inside this folder, there are a lot of important informations about the model, and you can see metrics and change training parameters to obtain more powerful models.
And most importantly, this folder contains your trained model(best.pt)
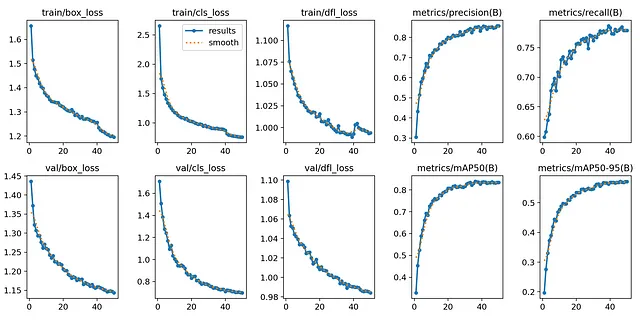
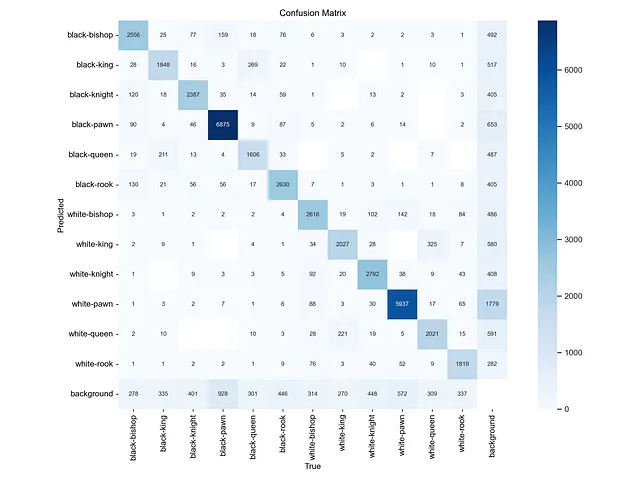
Load the trained model, and test it with different images to see how your model performs.
from ultralytics import YOLO
from PIL import Image

model = YOLO("best.pt") # path to .pt model file

results = model("test_image.jpg") # path to test image

# Show the results
for r in results:
    im_array = r.plot()  # plot a BGR numpy array of predictions
    im = Image.fromarray(im_array[..., ::-1])  # RGB PIL image
    im.show()  # show image
    im.save('results.jpg')  # save image
