Physical Address
304 North Cardinal St.
Dorchester Center, MA 02124
Physical Address
304 North Cardinal St.
Dorchester Center, MA 02124
→ Step by step guide for YOLO object detection models in C++.
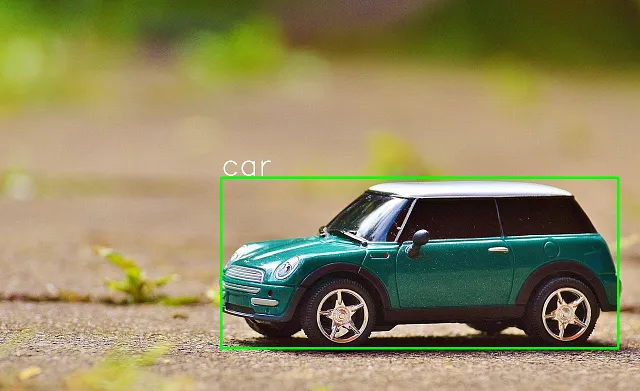
Running and training object detection models in Python has become quite easy thanks to user-friendly libraries like Ultralytics, but what about running YOLO models in C++? There is a lot of application that uses C++ for computer vision especially when performance matters, and it is important to learn using YOLO models with C++.
Now, I will share with you a step by step guide to running YOLO models with C++ by using only the OpenCV library.
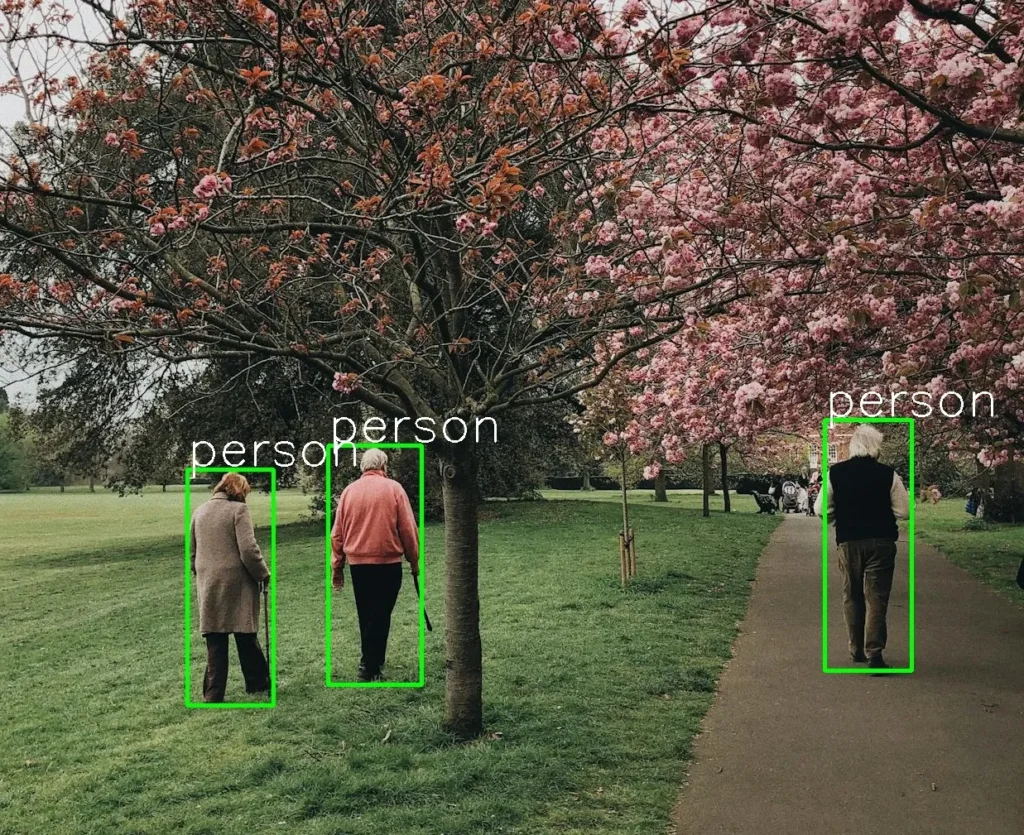
This article is about how to run YOLOv5 models on CPU, not GPU. Running models on GPU requires installing CUDA, CUDNN, and other things that can be confusing to install. I will write another article in future about how to run YOLO models with CUDA support.
It is important to know that for higher FPS, you should run your models with CUDA support.
For now, you only need to install the OpenCV library. If you haven’t installed it, you can install it from this link.
Okay, lets start.
There are different model formats, and ONNX is the most popular one. You can see all kinds of models like object detection, image segmentation, image classification models in ONNX format.
Now, create a new folder and clone the yolov5 repositroy from terminal.
git clone https://github.com/ultralytics/yolov5
cd yolov5
pip install -r requirements.txt
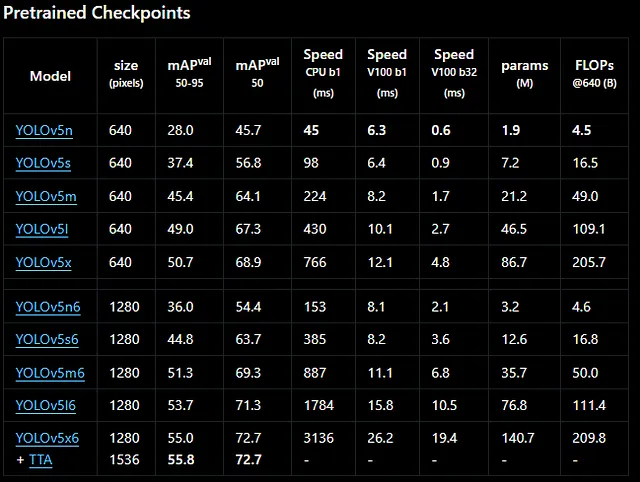
I will use pretrained yolov5s.pt model, but you can use your custom yolov5 models; the process doesn’t change. You can download pretrained models from this link .
If you don’t want to use pretrained models or if you want to train your own custom models, I have an article about it; you can read it
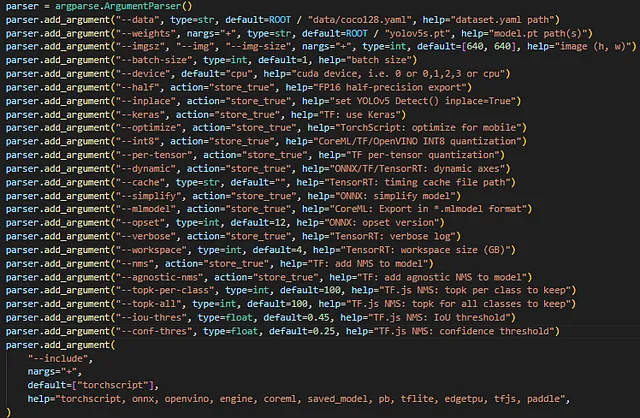
Now let’s export YOLO model to ONNX format. There are different parameters; you can check the image below. You can edit export.py file(yolov5/export.py) or manually change parameters from terminal just like I did here. For custom models, you need to change the weights to your custom model weights (your_model.pt file).
python yolov5/export.py --weights yolov5s.pt --img 640 --include onnx --opset 12
Important Note: You need to set opset to 12 here; otherwise, it will probably give an error. This is a common issue, and you can check GitHub to learn more about this error.
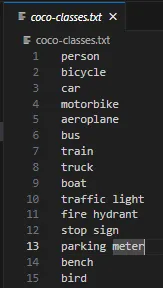
This step is quite easy; you just need to a create txt file for storing labels. If you’re using a pretrained YOLO model like me, you can download the txt file directly from this link.
If you have a custom model, then create a new txt file and write your labels in it in the same format as the image below. You can name this file whatever you want; it doesn’t matter, just don’t forget to change the file name when needed.
Now, let’s create a CMakeLists.txt file. This file is required when using CMake to compile a C++ program. If you installed OpenCV from the link that I shared, you already have CMake installed.
Dont forget to change:
cmake_minimum_required(VERSION 3.10)
project(cpp-yolo-detection) # your folder name here

# Find OpenCV
set(OpenCV_DIR C:/Libraries/opencv/build) # path to opencv
find_package(OpenCV REQUIRED)

add_executable(object-detection object-detection.cpp) # your file name

# Link OpenCV libraries
target_link_libraries(object-detection ${OpenCV_LIBS})
Finally, this is the last step. I used code from this repository, but I modified some parts and added comments to help you understand it better.
#include <fstream>
#include <opencv2/opencv.hpp>


// Load labels from coco-classes.txt file
std::vector<std::string> load_class_list()
{
    std::vector<std::string> class_list;
    // change this txt file  to your txt file that contains labels
    std::ifstream ifs("C:/Users/sirom/Desktop/cpp-ultralytics/coco-classes.txt");
    std::string line;
    while (getline(ifs, line))
    {
        class_list.push_back(line);
    }
    return class_list;
}

// Model
void load_net(cv::dnn::Net &net)
{
    // change this path to your model path
    auto result = cv::dnn::readNet("C:/Users/sirom/Desktop/cpp-ultralytics/yolov5s.onnx");

    std::cout << "Running on CPU/n";
    result.setPreferableBackend(cv::dnn::DNN_BACKEND_OPENCV);
    result.setPreferableTarget(cv::dnn::DNN_TARGET_CPU);

    net = result;
}

const std::vector<cv::Scalar> colors = {cv::Scalar(255, 255, 0), cv::Scalar(0, 255, 0), cv::Scalar(0, 255, 255), cv::Scalar(255, 0, 0)};

// You can change this parameters to obtain better results
const float INPUT_WIDTH = 640.0;
const float INPUT_HEIGHT = 640.0;
const float SCORE_THRESHOLD = 0.5;
const float NMS_THRESHOLD = 0.5;
const float CONFIDENCE_THRESHOLD = 0.5;

struct Detection
{
    int class_id;
    float confidence;
    cv::Rect box;
};

// yolov5 format
cv::Mat format_yolov5(const cv::Mat &source) {
    int col = source.cols;
    int row = source.rows;
    int _max = MAX(col, row);
    cv::Mat result = cv::Mat::zeros(_max, _max, CV_8UC3);
    source.copyTo(result(cv::Rect(0, 0, col, row)));
    return result;
}

// Detection function
void detect(cv::Mat &image, cv::dnn::Net &net, std::vector<Detection> &output, const std::vector<std::string> &className) {
    cv::Mat blob;

    // Format the input image to fit the model input requirements
    auto input_image = format_yolov5(image);

    // Convert the image into a blob and set it as input to the network
    cv::dnn::blobFromImage(input_image, blob, 1./255., cv::Size(INPUT_WIDTH, INPUT_HEIGHT), cv::Scalar(), true, false);
    net.setInput(blob);
    std::vector<cv::Mat> outputs;
    net.forward(outputs, net.getUnconnectedOutLayersNames());

    // Scaling factors to map the bounding boxes back to original image size
    float x_factor = input_image.cols / INPUT_WIDTH;
    float y_factor = input_image.rows / INPUT_HEIGHT;

    float *data = (float *)outputs[0].data;

    const int dimensions = 85;
    const int rows = 25200;

    std::vector<int> class_ids; // Stores class IDs of detections
    std::vector<float> confidences; // Stores confidence scores of detections
    std::vector<cv::Rect> boxes;   // Stores bounding boxes

   // Loop through all the rows to process predictions
    for (int i = 0; i < rows; ++i) {

        // Get the confidence of the current detection
        float confidence = data[4];

        // Process only detections with confidence above the threshold
        if (confidence >= CONFIDENCE_THRESHOLD) {

            // Get class scores and find the class with the highest score
            float * classes_scores = data + 5;
            cv::Mat scores(1, className.size(), CV_32FC1, classes_scores);
            cv::Point class_id;
            double max_class_score;
            minMaxLoc(scores, 0, &max_class_score, 0, &class_id);

            // If the class score is above the threshold, store the detection
            if (max_class_score > SCORE_THRESHOLD) {

                confidences.push_back(confidence);
                class_ids.push_back(class_id.x);

                // Calculate the bounding box coordinates
                float x = data[0];
                float y = data[1];
                float w = data[2];
                float h = data[3];
                int left = int((x - 0.5 * w) * x_factor);
                int top = int((y - 0.5 * h) * y_factor);
                int width = int(w * x_factor);
                int height = int(h * y_factor);
                boxes.push_back(cv::Rect(left, top, width, height));
            }
        }

        data += 85;
    }

    // Apply Non-Maximum Suppression
    std::vector<int> nms_result;
    cv::dnn::NMSBoxes(boxes, confidences, SCORE_THRESHOLD, NMS_THRESHOLD, nms_result);

    // Draw the NMS filtered boxes and push results to output
    for (int i = 0; i < nms_result.size(); i++) {
        int idx = nms_result[i];

        // Only push the filtered detections
        Detection result;
        result.class_id = class_ids[idx];
        result.confidence = confidences[idx];
        result.box = boxes[idx];
        output.push_back(result);

        // Draw the final NMS bounding box and label
        cv::rectangle(image, boxes[idx], cv::Scalar(0, 255, 0), 3);
        std::string label = className[class_ids[idx]];
        cv::putText(image, label, cv::Point(boxes[idx].x, boxes[idx].y - 5), cv::FONT_HERSHEY_SIMPLEX, 2, cv::Scalar(255, 255, 255), 2);
    }
}


int main(int argc, char **argv)
{
    // Load class list
    std::vector<std::string> class_list = load_class_list();

    // Load input image
    std::string image_path = cv::samples::findFile("C:/Users/sirom/Desktop/cpp-ultralytics/test2.jpg");
    cv::Mat frame = cv::imread(image_path, cv::IMREAD_COLOR);

    // Load the  modeL
    cv::dnn::Net net;
    load_net(net);

    // Vector to store detection results
    std::vector<Detection> output;
    // Run detection on the input image
    detect(frame, net, output, class_list);

    // Save the result to a file
    cv::imwrite("C:/Users/sirom/Desktop/cpp-ultralytics/result.jpg", frame);

    while (true)
    {
        // display image
        cv::imshow("image",frame);

        // Exit the loop if any key is pressed
        if (cv::waitKey(1) != -1)
        {
            std::cout << "finished by user\n";
            break;
        }
    }

    std::cout << "Processing complete. Image saved /n";
    return 0;
}
mkdir build
cd build
cmake ..
cmake --build .
.\Debug\object-detection.exe
